Backlight for "thin" panels

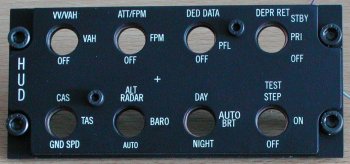
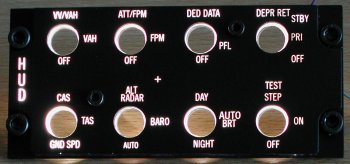
| Head Up Display (HUD) panel Backlight for "thin" panels |
|
The
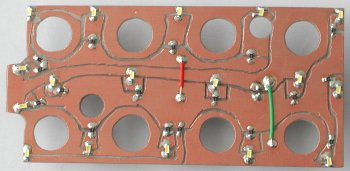
The backlight circuit board is made using the same approach as used for the
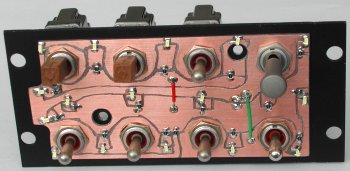
As the panel is hollow, you can use insulated wires to connect "planes of copper" that must be connected to each other. Make
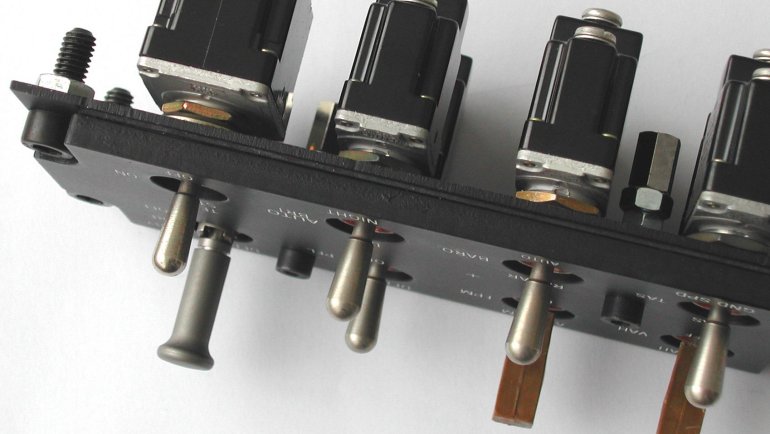
sure that the copper underneath the mounting screws of the switches is either part of the "ground plane" or insulated. The
switches also make contact with the metal backplate, and the metal backplate will make contact with the frame of the console,
so if the copper underneath the mounting screws is not insulated or connected to ground, this will
cause a short circuit!
|
|
It is always cool to see a panel when the backlighting of the panel is switched on.
|
|
The solution for the thickness of the backlighting PCB plus SMD LEDs, if the panel itself is relatively thin, is simple, yet elegant. I used the rubber of the inner tyre of a bicycle wheel. This stuff has several advantages. It is easy to cut to the desired shape, it is already black, and it is a "soft" material, so with little pressure the rubber prevents (light) leakage between the panel and the backplate.
Remark
Note that due to the PCB, the screw that mounts a switch will also "go deeper"
into the rear isde of the panel. You may cut some extra depth around a switch in the rear side of the panel, but if the
panel is thin and you do not want to take any risks, you could also make the hole in the PCB as large as needed so that the
screw mounts directly on the backplate. If the PCB "moves around" on the backplate in the rear side of the panel (because the
PCB is no longer held by any screw), you may use a minimal droplet of glue between the PCB and the backplate (after positioning
using the panel).